Showing posts with label Bread. Show all posts

Monday, May 19, 2014

French Baguettes... The Food Nanny


The Food Nanny was a huge Success!
I can't stop talking about what I learned, to whoever will listen to me.
So since I have you as my captive audience let me share some notes with you as I sat listening to this Beautiful woman.
Then if you are a really good listener, I will share her baguette recipe (with her permission).
 
I came home from work the other day and pulled out her first book, looked up the baguette recipe and whipped it up real fast. Then off I went to take dinner in to a friend.
Guess what?
They were amazing. My first attempt too.
 
 
YOU can do it too, and your family, friends or neighbor will Love You!
 
(update: I have successfully made them 5 times in a week since Liz visited the Bloomington Stake! No, I didn't eat them all...I Love giving them away.
Thank you Liz and Thank you sweetheart for book #2 and new baguette pans for Mothers Day!)


Notes from our Stake R.S. Saturday Event with Liz Edmunds...The Food Nanny...

1. Don't eat red meat on back to back nights.
2. Eat no meat at all (meatless dishes) at least 1 to 2 times a week.
3. Eat fresh fish at least once a week, preferably 2 nights a week.
 
How to accomplish this...
1. make a 2-week meal plan.
2. Make a grocery list according to those meals, then go shopping (saves money).
3. Don't deny yourself, just apply portion control.
4. Plan 2 to 3 vegetables with most meals. Canned, frozen or fresh. All are good.
5. Incorporate whole grains, offer fresh or bottled fruit often.
6. A home needs sweet and savory.

SAVES YOU MONEY, KEEPS YOU HEALTHY, AND CREATES FAMILY MEMORIES!

French Baguettes (p. 225)

I will never forget the first time we bought a baguette in France. We all savored every bite. Denser than Italian bread. It is wonderful plain or with butter, and also makes excellent garlic bread and bruschetta. When the kids were young, I would make an extra loaf for French toast the next morning. It makes cute little rounds and tastes so good! I hope you enjoy this recipe. It’s a wonderful comfort bread that goes well with any soup you choose to make!
French Baguette

French Baguettes (p. 225)

2 baguettes
WHAT YOU’LL NEED
1 1/2 cups warm water
1 1/2 T. active dry yeast, (2 packets)
2 tsp. sugar
3 1/4 cups flour
2 tsp. salt
melted butter
WHAT YOU’LL DO
  1. In a small bowl combine 1/2 cup of the warm water, the yeast and 1 tsp of the sugar.  Stir to combine and let mixture stand for about 5 minutes or until foamy.
  2. In a large mixing bowl blend the flour, salt, the remaining teaspoon of sugar and the yeast mixture.
  3. Gradually add remaining water and mix until the dough forms a smooth ball that is not too sticky to handle (if it is too sticky add a little more flour).
  4. Turn the dough onto a floured surface and knead briefly until the dough is smooth and elastic. Cut the dough in half and shape the halves into baguettes.
  5. Grease a baguette pan and place the loaves in the pan.
  6. Score the loaves down the middle, cover with a dish towel and let rise in a warm place for about 30 minutes or until doubled in size.
  7. Preheat the oven to 450 degrees and place a shallow pan of water in the bottom of the oven to create steam.
  8. Bake the baguettes for 15 minutes. If desired brush the tops with melted butter halfway through the baking.
*For a softer crust, brush with butter when they have finished baking.

Monday, February 10, 2014

Easy 1 hour Bread

Home Made Bread in only an Hour!

I swear when I saw this picture I actually smelled the bread baking...Then I realized it was my husband in the kitchen making popcorn.


I think I have an obsession with warm homemade bread right out of the oven. I have actually been know to parade around the house showing off the beautiful master pieces as I take them from the oven. If you need to feel good about yourself, then you may want to bake some bread.

Who wouldn't want a loaf of this, and really who couldn't make this when it's just that easy.
give it a try...Easy 1 hour Home Made Bread

There is even a video on how she made it, and if you are a visual person it will be enough to get you up out of your seat and into the kitchen baking.

Simple One Hour Homemade Bread
Makes 2 loaves
5 1/4 cups white bread flour
2 – 4 Tbsp. sugar
1 1/2 tsp. salt
1 1/2 Tbsp. (rounded) saf-instant yeast
1 1/2 Tbsp. oil
2 cups warm water (somewhere between 100 and 115 degrees Fahrenheit)
1. Mix dry ingredients.  Add oil and water.  Mix for 1 minute and then check the consistency of the dough.  The dough should be very sticky.  If it is too dry, add more water.
2. Mix for 5 minutes.  (Do not add any more flour after the dough has finished mixing.)
3. Spray kneading surface with cooking spray and turn dough out onto surface.  Knead dough briefly until it has a smooth even consistency (this will only take several turns of the dough to accomplish).
4. Divide dough into 2 pieces (or more if you wish to have smaller loaves) and shape loaves into desired shapes and place on greased baking sheets.  Cover with a large dish towel and let rise for 25 minutes.
5. While loaves are rising, preheat oven to 350 degrees Fahrenheit.  When loaves are ready to go into the oven, use a sharp knife (you can lightly spray your knife with cooking spray to prevent dragging) to make several slashes in the top.  Make each cut about 1/4-inch deep at a 30 degree angle.  Bake loaves for 25 minutes, or until they are golden brown.
 
 
Nice huh?!!

Monday, January 20, 2014

Simple Flat Breads From Food Storage Staples

Making Simple Flat Breads From Food Storage Staples Can Sustain Life In An Emergency
Simple Flat Breads From Food Storage Staples

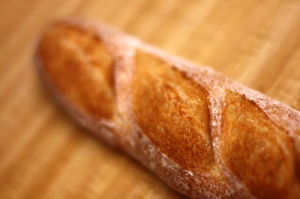
Everyone loves fry bread, tortillas and pita bread. All these breads can be made from a few staple ingredients.
If you get caught in an emergency situation, these breads can be made and eaten to sustain your life. Add canned meat, beans, rice and rehydrated vegetables and you have a meal.

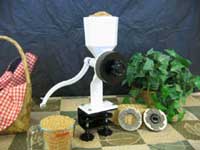
Wheat Grinder Or Grain Mill
A wheat grinder or grain mill is very important to have. If you have a wheat grinder, you can make whole grain flour that is much more nutritious than white flour. I suggest you have an electric grinder for everyday use and a hand-operated grain grinder for emergency use if the power goes out. I really like the Wonder Junior Hand Grain Grinder and the Wonder Mill Electric Grain Grinder.

Food Storage Staples For Making Bread
Everyone should store the following staples for making simple breads:
  • Wheat and other grains to grind into whole-grain flour.
  • White flour (has no nutritional value).
  • Shortening or olive oil.
  • Sweetener such as honey, sugar or agave.
  • Salt.
  • Baking powder.
  • Dry yeast. (Keep it in the freezer.)
  • Powdered milk.
  • Potable water.
Wonder Junior Hand Grain GrinderWith these basic ingredients you can make just about any flat bread, tortilla or pita bread. Try practicing making these simple breads so that if you ever need to make them in an emergency, you will feel confident that you can.
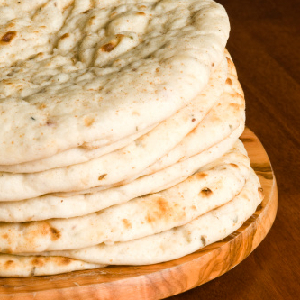
Pita Bread Recipe
2 packages dried yeast (4 ½ teaspoons)
1 tablespoon sugar
1½ cups lukewarm water
4 cups  flour (white, whole wheat, multigrain or a combination)
1 teaspoon salt
1 tablespoon olive oil
  1. Preheat the oven to 500 degrees.
  2. Dissolve the yeast and sugar into 1½ cups of warm water, then set it aside for 10 minutes so it can proof. This means it starts to grow and form bubbles.
  3. Mix the flour, salt and oil together in a bowl and then add the yeast and water mixture.
  4. Knead the dough until it is smooth and elastic, adding more flour if necessary until it is no longer sticky.
  5. Place the dough in a warm, oiled bowl, turning the dough around to coat the surface with oil. Cover the bowl with a dry cloth and set it in a warm place. Allow the dough to rise until it is double in volume. This takes about two or three hours.
  6. Punch down the dough and knead it for about two minutes. Divide and roll the dough into 12 little balls.
  7. Place the dough balls on a dry cloth in a warm place, then cover with another cloth and let them rise for about 30 minutes.
  8. Roll out the balls into circles about 1/8-inch thick.
  9. Bake the pita bread on a preheated cookie sheet in the center of the oven for six to seven minutes, watching them so they don’t burn. When the bread cooks, it will puff up like a balloon. It will collapse when it cools.
  10. Once the pita bread is cooked, remove it from the baking sheet and cover it with a dish towel with plastic wrap on top of the towel. Repeat with each loaf until all the pita bread is cooked. If you do not cover with the towel and plastic wrap, the bread will harden and not be as good.
  11. Store the pita bread in a zippered baggie. You can eat it immediately or freeze it.
Pita bread can be eaten with any meal. A staple in many Middle Eastern countries, pita bread can be used as a spoon or scoop and is eaten with olive oil, hummus, dips, soups, sauces, meats and vegetables. When cut in half, pita bread can be opened up like a half-moon pocket that can be filled with meats and vegetables.

Old Indian Fry Bread Recipe
2 cups white or whole-wheat flour
1½ teaspoons salt
1 tablespoon baking powder
2 tablespoons shortening or lard
¾ cup milk or (½ cup powdered milk mixed with ¾ cup warm water)
Vegetable oil for frying
  1. Mix all the dry ingredients together. Rub the mixture with your fingers until it forms coarse crumbs. Push all the shortening and flour crumbs to the side of the bowl.
  2. Add the milk and mix this together in a circular motion with your fingers. Knead the dough until it forms a soft dough ball. It usually takes three to five minutes to knead the dough by hand. It takes practice, and you will get a feel for it. Continue to add a little extra flour to the countertop and continue kneading the dough until it is no longer sticky.
  3. Divide the dough into six portions and shape them into balls. Flatten each of the balls with your fingers from the center outward until it is round like a small pizza. Pull it back and forth and form it into a 6-inch tortilla. You can roll the dough with a rolling pin to flatten it as well.
Basic Dough
This dough can be used for making into tortillas or flat bread. The difference is that tortillas are cooked in a cast iron skillet without oil and flat bread is cooked in a frying pan with oil. How you cook it depends on what you are making.
Tortillas are usually filled with meat and ingredients such as tomatoes, onions and cheese and then rolled into a burrito or soft taco. Fry bread is used flat and topped with meat such as shredded beef, hamburger, chicken or pork, then topped with black beans, pinto beans, rice, shredded lettuce, tomatoes, minced onions, cheese, sour cream and guacamole. If fresh food is unavailable, use canned tomatoes, canned beans, canned meat and whatever else you have on hand.

Tortillas
To fry tortillas, the pan must be hot with no oil in it so that the bread dough does not raise and puff up like fry bread. It stays flat and soft.

Fry Bread
To fry the flat bread, you will need to prepare a frying pan with vegetable oil in it about 1/8-inch thick. Heat up the oil in the pan and place the fry bread in the oil. When it turns golden brown, turn it over and cook it on the other side. Take it out of the oil and place it on a paper towel to absorb the excess oil.

Bread Cooked Over Hot Coals Or On a Stick
Use this same recipe and method of preparation as for fry bread and tortillas. Shape the dough into a circular piece of flat bread and cook it on a wire rack that has been placed above the hot coals. Turn the bread over several times to make sure it is browned on both sides and has thoroughly cooked.
You can cook flat bread on a stick by wrapping the dough around a willow-type stick and securing it by pinching the dough together so it won’t fall off the stick. Hold it over the warm coals and turn it often so that all sides will brown evenly and cook all the way through.
Cookin' With Home StorageThis recipe came from the book Cookin’ With Home Storage.
This book has more than 550 food storage recipes as well as:
  • Emergency food storage instruction and tips on survival.
  • What to store and how much to store.
  • Reconstituting charts for dehydrated and freeze-dried foods.
  • Authentic pioneer and early settler recipes using basic food.
  • Fascinating historical pioneer information.
  • Natural beauty and personal care.
  • Natural household cleaners.
  • Grandma’s home remedies.
  • Emergency baby food.
–Peggy Layton

Thank You Peggy for our guest post. Gotta love the basics of food storage and it's life sustaining ability. Not to mention how Yummy it taste!

a home economist and licensed nutritionist, holds a B.S. in Home Economics Education with a minor in Food Science and Nutrition from Brigham Young University. Peggy lives in Manti, Utah with her husband Scott. Together they have raised seven children. Peggy owns and operates two businesses.  She is nationally known for publishing a series of seven books on the subject of food storage and also lectures and teaches seminars about preparedness and using food storage products. Peggy practices what she preaches, has no debt, grows a huge garden, lives off the land, raises chickens, bottles and dehydrates food and has time left over to operate her businesses.

Monday, October 7, 2013

Cinnamon Honey Butter

Remember the day I made Apple Butter for the first time.
Well I had also seen a recipe for Cinnamon Honey Butter that I thought sounded Really good and looked So easy.
So I quickly threw it together and here is proof .
(Sorry for the non movie star bite.)
The Cinnamon Honey Butter was a Winner!
 
 
 This is how much I was able to get out of the recipe.
Just enough to keep and take visiting teaching with a loaf of bread.
 
 
If you like Texas Roadhouse's cinnamon butter, then you will love this.

 Ingredients:
2 sticks of butter (room temperature)
1 cup of powdered sugar
1 cup of honey
2 teaspoons of cinnamon.

I whipped up the butter with my beaters, then added the rest of the ingredients. Super Easy, and a fun addition to a meal.

OH, and how is this Food Storage you may ask...
Well I have all of those ingredients already on hand in my short and long term supply.

Short term (3 month supply), is the butter storage in the freezer.

Long term (1 year supply), would be the Butter Powder, or Canned Butter (I bet it would work just fine).
 
See how yummy Food Storage can be!

Monday, February 4, 2013

LUNCH / Pita Pocket Bread

February is all about LUNCH
 
What do you do for Lunch?
Home, school or work. It's something that might take some thought the night before if you are needing to pack or prepare for the morning.
 
First thing that comes to my mind (besides left overs, which work well if you are at home or in an office with a microwave).
Sandwiches. Am I right?
 
I have posted a few different bread recipes that are my favorites and I highly recommend you try them (look on the side bar under bread to find them). But today I am thinking of something different, still in the bread family.
 
Pita Pockets
 
homemadepitapocketbreadban.jpg
 
I have been watching tons of videos on "How To" make them, trying to find just the right one to post here in the hopes you may want to view it.
So here is one that I selected for your viewing pleasure.
It is presented by Thrive shelf reliance, a food storage company.
 
disclaimer: I do not sell nor have I purchased anything from this company. I am simply showing you what YOU can do with like ingredients.
 
The recipe is on the video along with all of the instructions.
 
Pinned Image
 
 
Whole Wheat Pita Bread
1 packet active dry yeast or (2 1/4 teaspoon active dry yeast)
1 Tablespoon Sugar or Honey
1 1/4 Cup warm water
1 cup Whole Wheat Flour
2 cups White Flour
1 1/2 teaspoon salt
2 teaspoon olive oil
 
All of these ingredients should be in a standard food storage supply. With a little bit of time invested you could be eating like Kings and Queens!
 
Pinned Image


Monday, June 18, 2012

My bread obsession

I admit I have a mild obsession with Artisan bread.
These are the pans that I normally make it in.
 Then I read a post on how to make it in a crock pot.
Imagine that, Bread in a Crock Pot...

 So I tried it.
 First you cut parchment paper to fit in the bottom of the crock pot.
Then place the ball of dough that you already let sit for the 12 plus hours to do it's thing.

 The original recipe said to cook it/bake it on High for @ 1 hour. I did the first hour then would check the loaf by gently touching it. It seemed "not ready" to me. Like it was still too doughy.
So I would set my timer for 15 minutes then another 15 then 10 then...?
So I am assuming for my first try it ended closer to 2 hours to bake on high.
 At least in my crock pot.
This is the loaf after it was done in the crock pot.
Notice how it is still white.
Next step is to brown the top (if you choose too. I would suggest it)

 The original recipe said to put it under the broiler for 10 minutes.
My mistake was to walk away from the oven. I wish I would have watched it because 10 minutes ruined everything. It burned it :(
No real big worries. A trick I learned from my childhood or was it newlywed days?
I scrapped the burn off the crust.
So it would probably have looked A LOT better if I had browned it properly.
But, hey, IT WORKED!

As long as I was putting together a batch of Artisan bread, why not do more. So I made one in the crock pot and 2 in the oven.
As long as the oven is heating up the house, might as well get 2 done at a time.
The one on the left is: Zest and Juice of one Orange, Cranraisins, and chopped up Almonds.
The one on the Right is: grated Parmesan cheese and dehydrated onions.

 Here are all 3 loaves together.
 I feel so bad that I burned the top one. But it was still yummy inside.

 Here is a trick I learned.

You know how once you slice the bread, the end that is cut dries out if it isn't put into a bag. Then if you put it in a bag it makes the bread soft. Which for some people is no big deal. Soft bread is good. It's just that to me, Artisan bread is to be crusty.
SO, as you can see, I placed them on their side after they were sliced. It worked. It kept the sliced side perfect, and not dried out. If you don't finish the bread in one sitting then you can place a light cloth over it and it will be fine the next day.
The bread really is best when devoured in the first or second day however.

We had to test each loaf to be able to critique them. Notice how the one on the right was our favorite (orange,cranraisin, almond)
In case you forgot...

3 cups of flour
1 1/4 teaspoon of salt
1/4 teaspoon yeast
1 1/2 cup water
(check out previous post on the how to of the bread if you have forgotten.
 http://www.providentpatty.blogspot.com/search/label/Artisan%20Bread
http://www.providentpatty.blogspot.com/search/label/Bread

Now go mix up a creation of your own and Share it with someone. In fact I will post a challenge for you all in my next post.

Monday, January 9, 2012

BREAD

My Favorite Bread Recipe


EZ Wheat Bread     makes 4 large loaves or 5 medium loves
5 cups warm water
2 Tbs. Yeast (I use SAF yeast which I add to the dry ingredients rather than in the water)
½ cup oil (applesauce works too)
½ cup honey ( or I usually use brown sugar)
1/3 cup wheat gluten
3 Tbs. Dough enhancer (I always use 3 Tbs. Vinegar)
¾ cup potato flakes (not potato pearls) (I purchase at church cannery)
1/3 cup non instant dry milk  (I purchase at church cannery)
2 Tbs. Salt
About 10 to 12 cups whole wheat flour ( I have used red wheat and white wheat)
    Mix ingredients in mixing bowl with dough hook for 12 to 15 minutes.  Take out and put dough ball on an oiled or floured counter and cut into fourths. Shape into loaves and place into greased bread pans. Cover and let rise for about 1 hour or until it is the desired size (depends on weather). Bake at 350 for 25 - 30 min. Take out of pans and place on cooling racks.

Makes delicious sandwich bread. Not thick and dry or crumbly.


The front 2 loaves are white wheat, the back 2 are white wheat with cinnamon chips.
Had to hurry and take a picture cause the cinnamon  bread disappeared!
YUMMY!!
See how easy that was. No need to let it rise, punch it down and rise again. Just one time then bake. Plus look at how many food storage items you used. It's easy to rotate your food when you are using it regularly.

-----------------------------------------------------------------------------------------
If you would like to have a loaf of bread a day for a year, this is what you will need to store. This is for a typical bread recipe with little ingredients. If your recipe is different, like mine is, then add to your storage as needed.

365 Loaves of Whole Wheat Bread
2C Wheat (3C flour) x 365= 730C (12 C/ #10 can)
61 #10 cans of wheat

1C Water x 365= 365C (16 gal.)
23 gal. Water

1 1/2 tsp. salt x 365= 547 tsp. (117 tsp per container)
4 2/3 containers of salt

2 T. melted shortening x 365= 730 T. (17 T. per cup, 2 1/4 cups per #)

19 # shortening or if you use oil like I do then add accordingly.

1/4C sugar x 365= 91C (2C=1#)
46# sugar
OR 1/4C honey= 91C (13 oz=1C=74# honey)
74# honey

2 tsp yeast x 365= 730 tsp= 243 T. (48 T. per #)
5 # of yeast
(above chart courtesy of Wendy Dewitt)

---------------------------------------------------------------------------------

Here is another Yummy bread recipe you just have to try!
Watch this quick video clip.
 SO easy, you will wonder why you never knew about it before.


Flour 3 cups
Yeast 1/4 teaspoon
Salt 1 1/4 teaspoon
Water 1 1/2 cups
12 hour rise
shape and let rise in towel for 2 hours
put in hot pan w/lid
500 degree oven
30 min with lid
15 to 20 without lid

Wasn't that the funniest thing ever. Now go and make some. I DID!